
Product Line Diff Driver
The PLADiff driver provides a UI which presents the means to
graphically invoke the PLADiff C2
component in order to calculate the architectural differences between
two product line architectures. To begin this process, one must first open up
both architectures in the File
Manager/Invoker and then invoke the PLADiff Driver. There are 5
steps the user must follow in order to successfully calculate the
difference between two architectures:
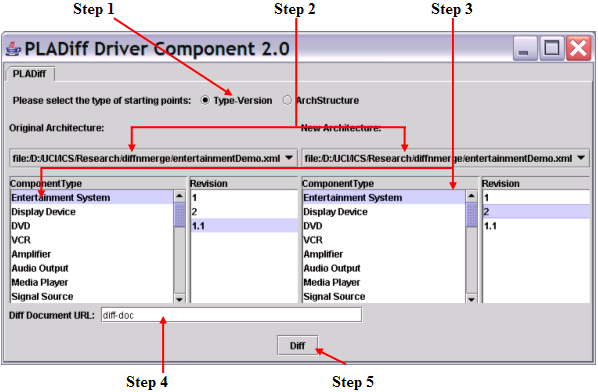
Step 1: Select the type of starting point
To begin, first select the type of starting points desired from the
radio button at the top. If Type-Version is
selected, the starting points will
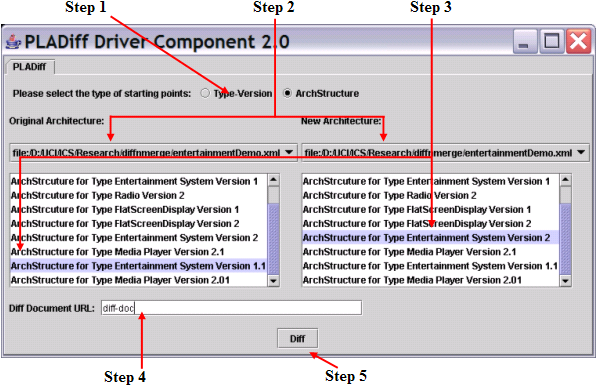
be a a particular version of a component type. If ArchStructure
is selected, the starting points will be ArchStructures within the
documents.
Note: the starting points
for both architectures must be of the same type.
Step 2: Select the architectures to diff on
The architectures to perform the differencing on can be
selected from the two drop down lists. The original (base)
architecture is the drop down list on the left hand side whereas the
new architecture is on the right hand side (under their respective
labels). The original architecture and the new architecture can
be from the same file.
Note: If an element exists only in the new architecture, it is
considered an "addition". If the element only exists in the
original/base architecture, it is considered an
"removal".
Step 3: Select the starting points
To select Type-Version starting points, make sure the
appropriate radio button is selected. First choose the
desired component type and then select the desired version. A
starting point must be selected for both the original and new
architecture. An example of this is shown below:
To select ArchStructure
starting points, make sure the appropriate radio button is
selected. Then click on the desired ArchStructure from the list
presented. A
starting
point must be selected for both the original and new
architecture. An
example of this is shown below:
Step 4: Specify the diff document URL/URN
Next the user must specify the URL/URN for the resulting
diff document. The diff document
will capture all the differences found between the original and the new
architecture. The name specified here can be in any name
convention, since saving the
resulting document to disk is done through the File
Manager/Invoker.
Step 5: Perform the diff
Finally, just click on the the Diff button to start the
differencing process. The buttons and drop down lists will be disabled
during the diff process and reactivated when the process completes. A
dialog box will also appear to inform the user that the diff process
has finished and the resulting document will be visible in the File Manager/Invoker. If an
error is encountered during the diff process, a dialog will appear
informing the user that a problem was encountered and the stack trace
will be printed to the command line.
Additional questions about the PLADiff Driver should be sent to Ping H. Chen.